This is the first post in a two part series: Part 2
O’Neill: Well, we’ll just have to cross that bridge when we come to it.
Bra’tac: No. The bridge is too well guarded.(Dialogue from Stargate SG-1 “Bloodlines” episode)
Since I was about 13 years old, I’ve used Autodesk products. Among these was Maya, before it was a product of Autodesk. If ever there was someone you would ask whether or not they liked Blender, it was most certainly not me. I remember once giving Blender a go maybe 5 or 6 years ago, and immediately didn’t like it, as the perspective camera didn’t look right. Everything was super wide, as if looking through a fish eye lens. To be fair, I never really gave Blender much of a chance. I looked at it once, then wrote it off in favor of 3D Studio Max. Much like O’Neill, I always thought, “Well, we’ll just have to cross that bridge when we come to it.” Well, I’m finally at that bridge, and I have to say, I was quite surprised.
Comparison Breakdown
It’s Pros and Cons Time!
Maya Pros
1. Great tools to block out models fast.
2. Animation tools and system works well and is easy to make complex rigs.
3. The Outliner is very easy to work with.
4. Materials are easy to initially get going.
5. Normal angles are easy to adjust.
6. The grid system, and snapping to grid is intuitive and easy.
7. Wide array of files you can export and import.
8. Not many non-functional features.
Maya Cons
1. Maya has a rather slow rendering engine.
2. I’ve had issues with the software bogging down with things like the directory browser.
3. Mel is horrible to work with. They need to either update it or change the language for their tools.
4. Measurements in Maya never seem to be exact. At the very least, it’s hard to tell.
5. The GUI needs an update. Making a material isn’t visually pleasing.
6. Painting weights for animation is pretty tedious in Maya.
Blender Pros
1. It’s FREE.
2. The GUI is phenomenal, and you can customize it.
3. It runs on a modified version of python, making it easy to create new tools.
4. The animation system is easy to use (and has dope sheet and curves editor).
5. Modeling is streamlined, with modeling tools that you might only find in Silo.
6. It has a fairly robust built-in sculpting package.
7. Adding bones, skinning, and painting weights are super easy and visually fun.
8. There’s an add-on store with user-created tools and GUI bits that expands the capabilities.
9. It has a modifiers panel, just like in 3Ds Max, which is is super cool.
10. Built-in game engine.
11. Built-in particle simulator that’s easy to use and produces great results.
12. Creating materials using nodes is easy. It reminds me of Shader forge.
13. It’s open source and updated frequently.
14. Literally, everything has a built-in shortcut, making it easy to get to things fast.
15. The Cycles Render engine is absolutely amazing.
Blender Cons
1. I’ve had some issues that I couldn’t solve with saving vertex normals to an FBX.
2. It took time to get used to the camera controls.
3. The outliner is pretty static, so you cant really move things around like in Maya.
4. There aren’t as many file type exports or imports (though, the important ones are there).
5. There aren’t nearly as many professional tutorials available for Blender.
6. Doing constraints is a bit difficult (I’m not really sure how to make very complex rigs, yet).
7. You have to use split edge tool to harden and soften normals, which I’m not fond of doing.
I feel as though Blender is the only real alternative to Maya, for indie developers. This is kind of a bold statement, I know, but after getting used to it, I can’t imagine ever dropping $4,000 for Maya. Everything about Blender is either the same as Maya, or better. There are a few minor gripes, like exporting FBX with vertex normals, but otherwise, it gets the job done.
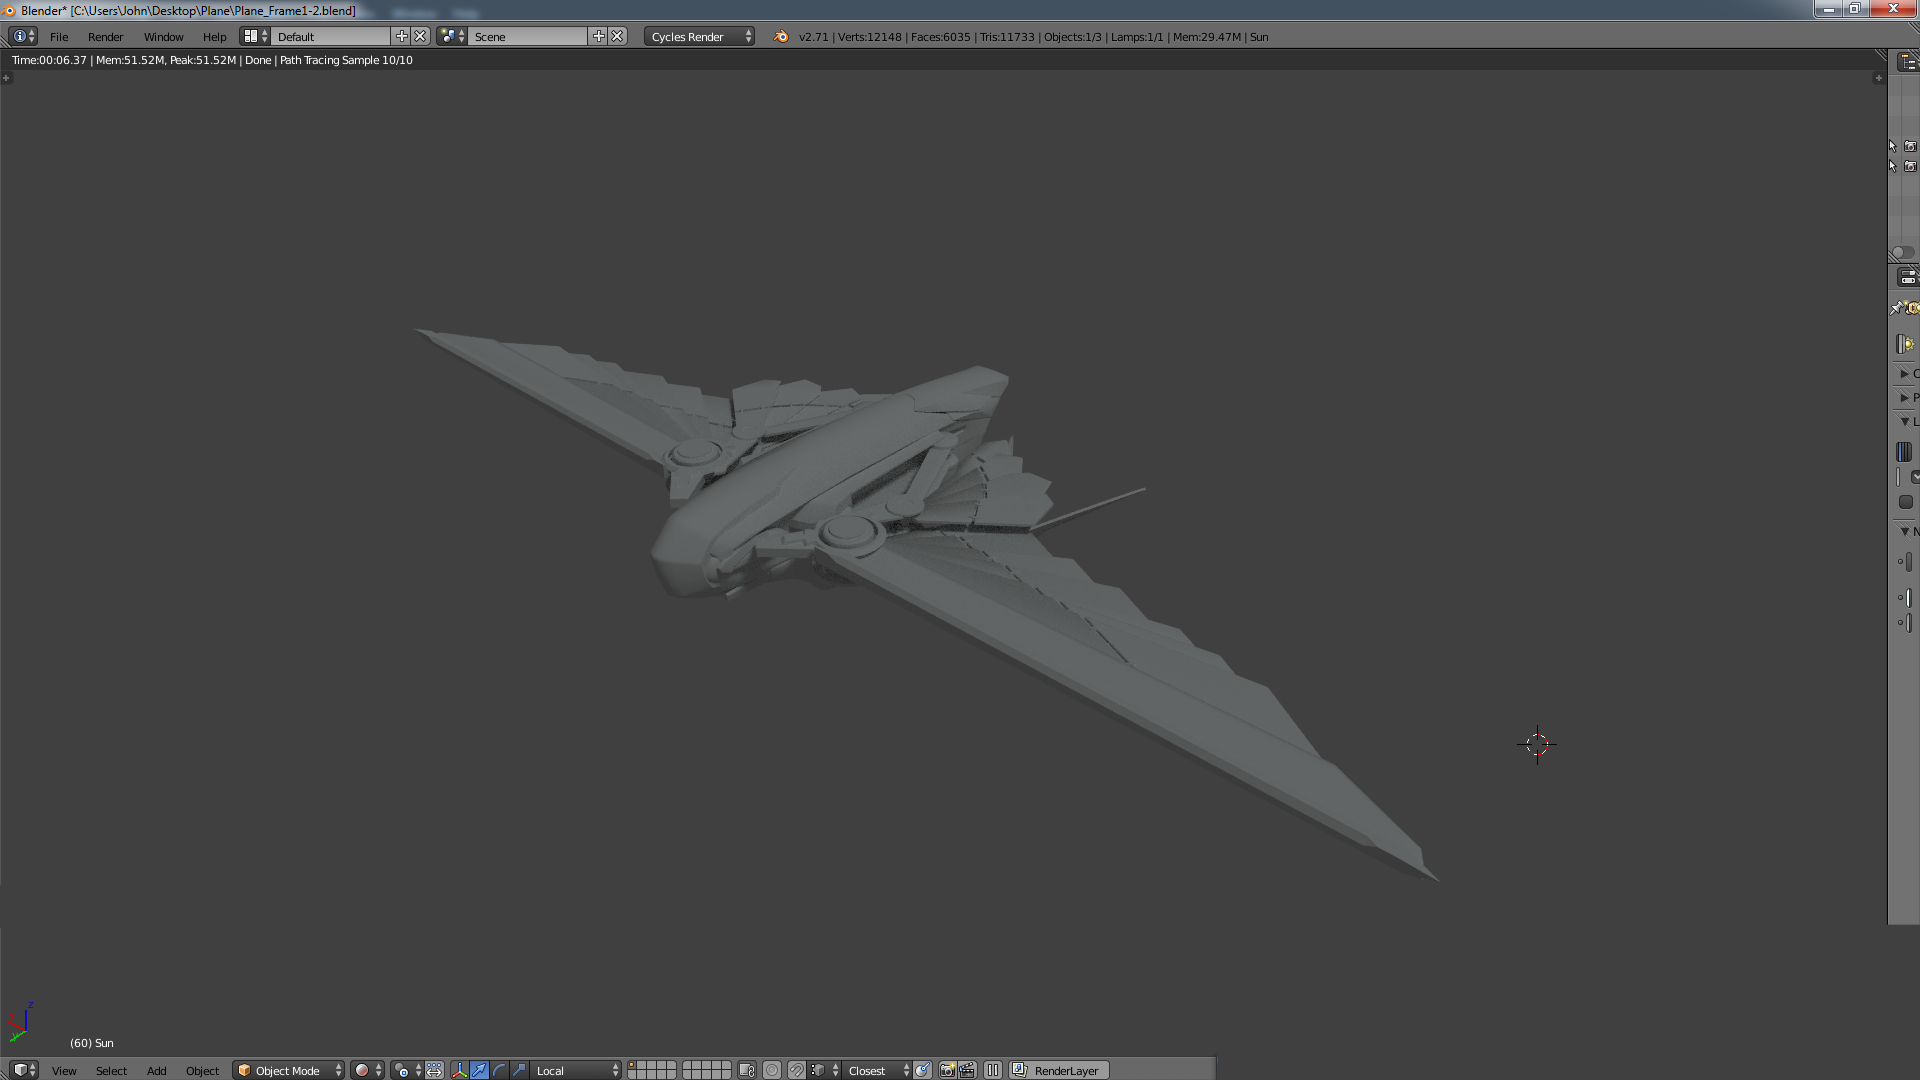
Here is a render of our plane, using Cycles render engine in Blender.
Features
Some cool stuff about Blender. (I swear, this isn’t a paid endorsement.)
I listed in my pros that the Cycles render engine is absolutely amazing. Just look at the above photo. Nothing was done beforehand to make it prettier. I believe it has a global illumination effect on at all times, meaning light bounces around, so you don’t have to create a material. However, the feature that really blew my mind was the ability to actively edit the properties of the render/ material/ geometry while still rendering. You can rotate around the scene and change the color or intensity of the lights, and it will update the render as you’re doing it.

I moved the camera in the scene. Notice the graininess of the plane. That’s Cycles rendering as I am moving.
Beyond that, Blender has a particle simulation/ physics simulation built straight into it. For example, let’s say you have a game that needs destructible environments, but its faster for you to “bake” the shards of broken geo beforehand, rather than run a simulation every time you start the game. In Blender, all you have to do is take the geo and run a fracture simulation on it. There’s one option that just fractures the model, using a calculation and nothing else. There’s even a simulation that allows you to adjust things like velocity, gravity, direction of fracture, fracture from hitting surfaces, and more. Below is a video of simulations and particles available in Blender. With all of these capabilities, it’s hard to remember that this is free software.
Blender also sports an add-on store, from which you can download user-created tools, modifiers, and anything that you plug into the program via python. For example, a simple tool that’s saved me a lot of time is a space bar menu. Before, the space bar was just used as a search feature. Now, not only does it search for anything you type into it, but it also has hot links to just about everything you might need, from creating geo, to parenting, to toggling the tool shelf on and off.
Blender offers an amazing modeling package, as well. The inserting reference image feature is small feature that changed a lot for me. With a couple of clicks, you can choose which view ports you want it in, all in the same menu location. Ease-of-use is a big focus of Blender. There’s a feeling that the people who make it are also the people who use it.
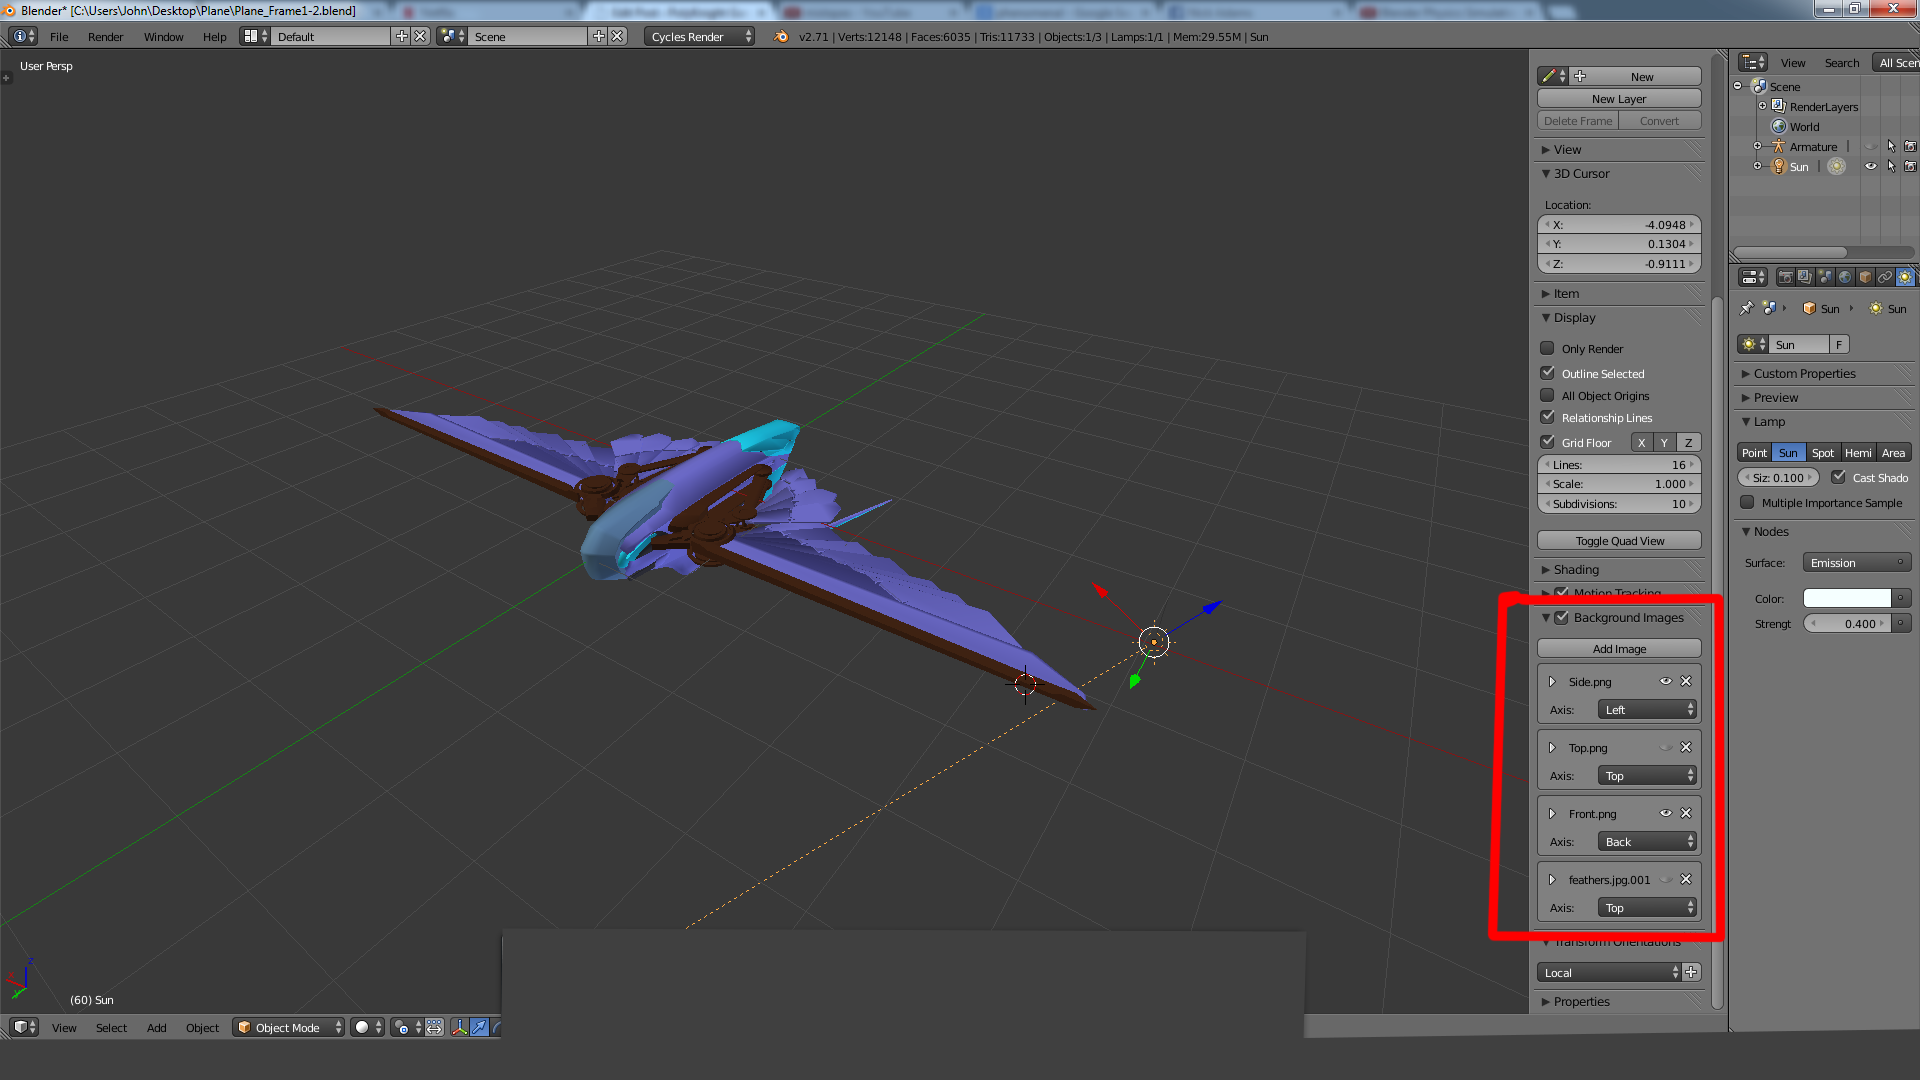
As you can see Steve has added some images and even specified where they should show up. Very easy process and the result is great.
Modeling in Blender
Actually working in Blender.
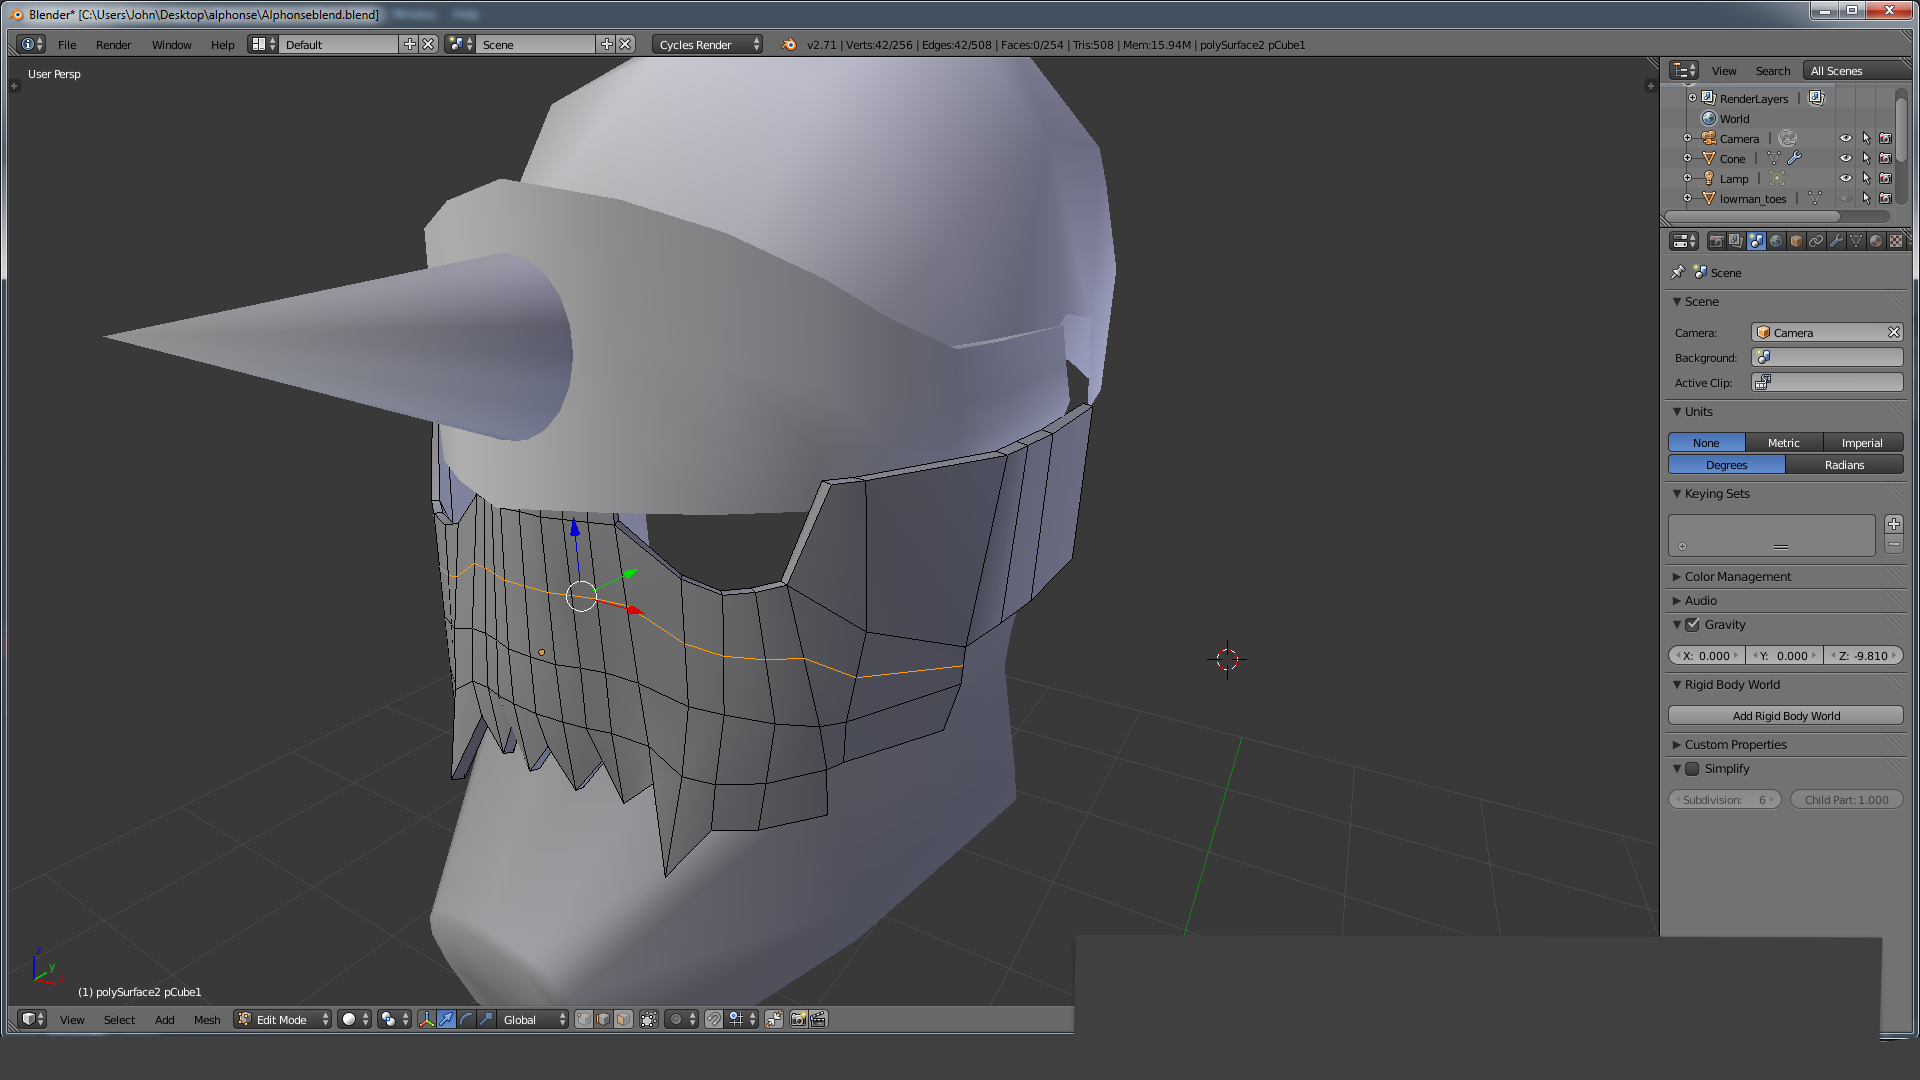
You start in what is called “object mode,” which allows you to select any object or any group of objects. A really cool feature allows you to hit the Z key while in object mode to bring up what appears to be a wire frame, but is actually your object’s edge flow and how your edge loops run together. Once done with selecting objects, hit the Tab key to enter “edit mode.” Whats cool about edit mode is that you can select edges, faces, vertices, or any combination of the three. If you hit the Z key, it puts everything in a wire frame mode, but the objects you’re currently editing have a light grey shading, which makes it really easy to see the geo you want to edit.

While in object mode, you get this cool outline that shows exactly what you have actively selected and what might be secondary selected. A yellow outline indicates active select.
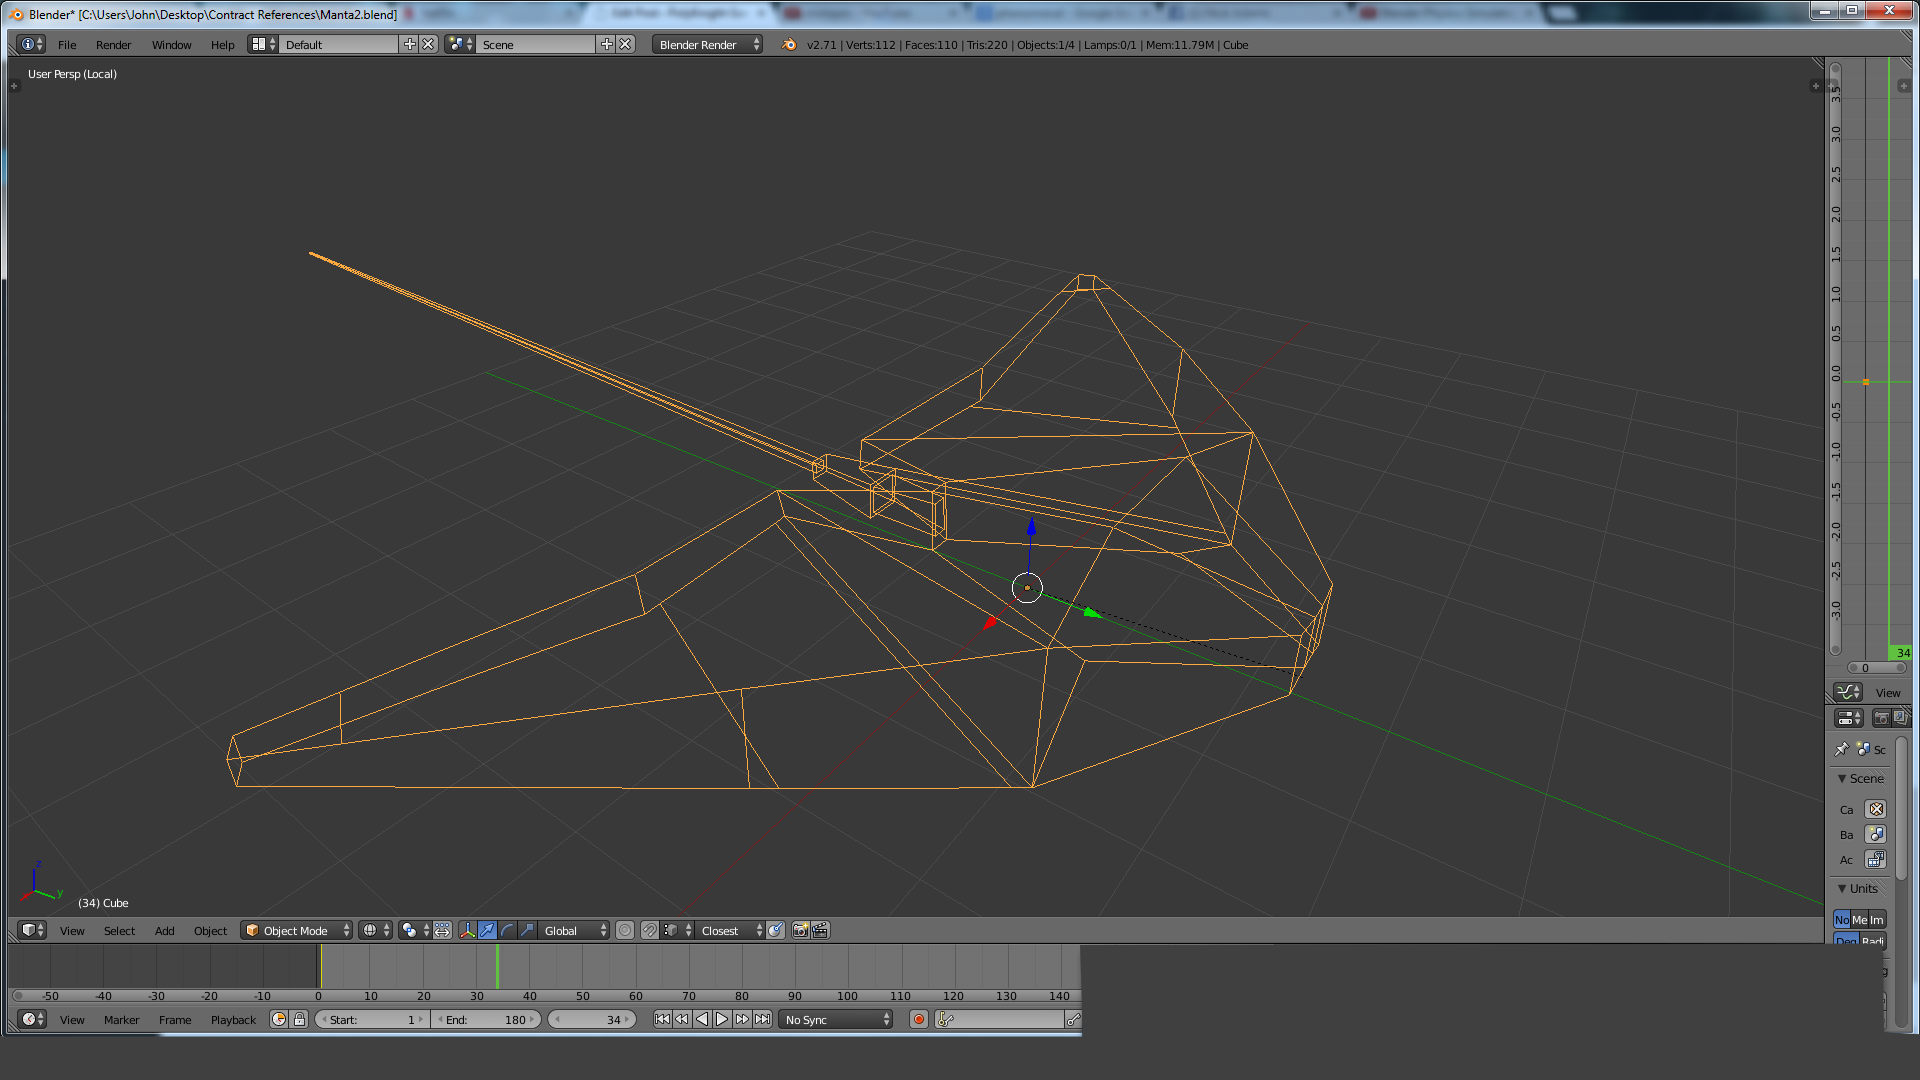
This is the wire frame in object mode. As you can see, there are some broken edge loops. This feature shows the flow of my edge loops, which, in this case, I broke.
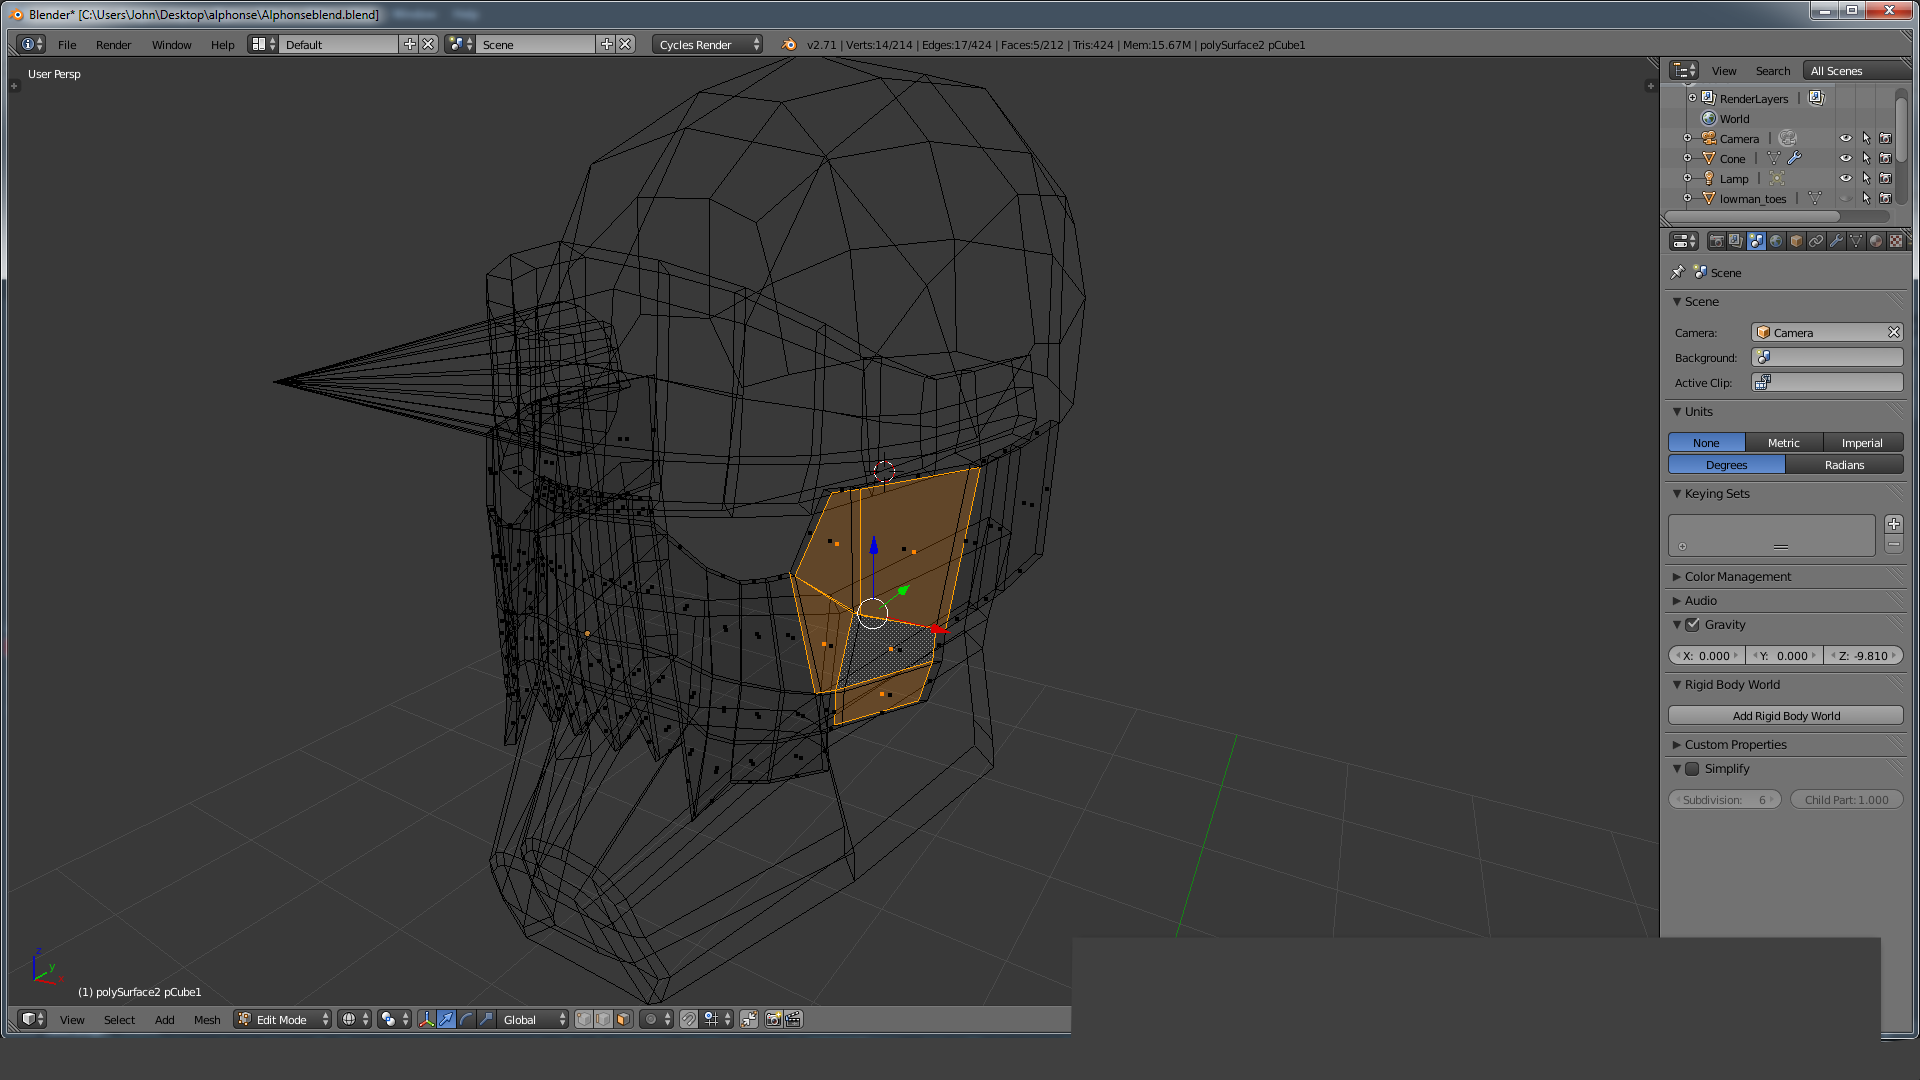
This is the wire frame in edit mode. I use it pretty much exclusively while modeling because it makes it easy to see exactly what I’m editing. The attention to detail makes the program easier to use without the user even noticing.
To wrap this up, I wanted to show a couple convenient tools that made my life easier. There are many, many tools that just make sense, but I never knew I needed.
For example, in Blender, it’s possible to insert an edge loop with CTRL+R, which is then set in the dead center on the faces you’re dividing. You can then scroll the mouse wheel up or down to gain or lose extra edge loops. Right click to confirm, and now you can slide the edge loops up and down on the faces. Right click again, and it places them. A lot of tools function this way in Blender with the same level of depth and complexity, but in a much smarter and more intuitive way.
Another feature that I know Silo has, but Maya lacks, is the ability to select faces, then press SHIFT+D to duplicate them and pull them out of the geometry, while retaining the faces they originated from.
The final tool I wanted to discuss was painting weights and parenting bones to your geometry. Skinning a mesh is as simple as parenting the geometry to the bones. Once this is done, each piece of geometry gets vertex groups that correlate to a bone that’s influencing it. Something cool about Blender is you can un-group, regroup, and mess with the geometry as much as you want without losing these vertex groups. This makes painting weights for mechanical rigs super easy, as you can just leave each moving part as separate geometry that’s parented to the bone structure, then enter “paint weight mode.” This way, you can only affect that one gear in your large machine of gears, and nothing else. Yet again, the Z key comes in handy. Once you’re in “painting mode” with the selected geometry, it wire-frames everything except the geometry, and highlights it with colors that signify bone weight on an object.
CTRL+R allows me to insert and edge loop anywhere. I can even drag the mouse around to new locations, after hitting the shortcut.

Here, I’Ve scrolled up and it’s given me many more edgeloops to work with.
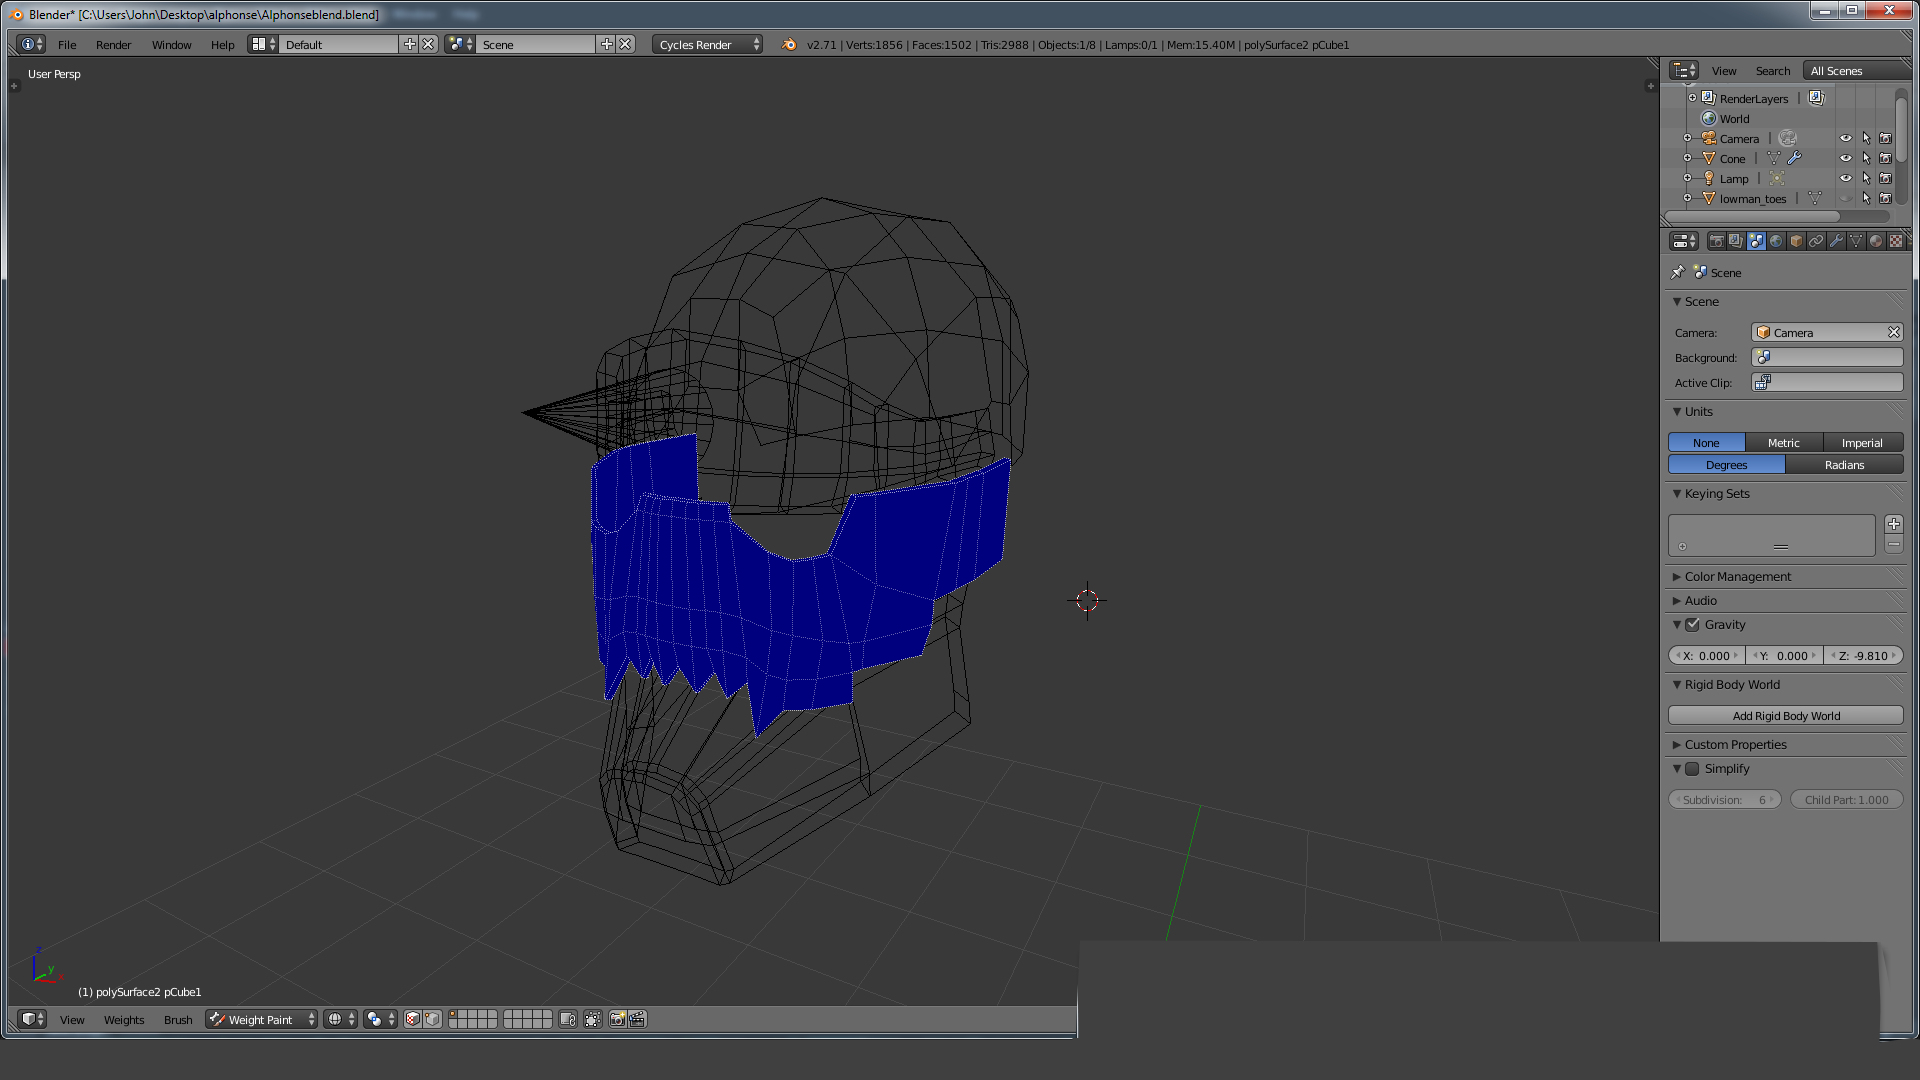
I’ve entered the paint weight feature and pressed the Z key. Notice that the geometry I have selected is highlighted blue. This means currently no weight from the current bone is affecting the object.
For me, Blender was an easy transition, and as an indie developer, a worthwhile one. For us, there was no option, as the cost for Autodesk products was just too high for our budget. Saving somewhere around $8,000 dollars for two licences means that we can use our money more effectively, while still producing all of the high-quality content we need for the game. Blender is an amazing program, and I would totally recommend it to anyone. I guess it just goes to show that you can’t judge a book by its cover program by its cost.
Regarding the fact that I’ve already read a little about the diferences between Maya and Blender I’m surprised at most by seeing Alphonse Elrics Helmet. Seriously, it’s like you’re real people x]
we are I swear xD and yea I have been working on that for a cosplay going to be using pepakura to print it out!
That’d be awesome! It’s rare to see someone cosplaying something so difficult. But Pepakura is an interessting and promising approach 😀
You don’t have to use pepakura to print it out. Blender has tools for unfolding your model into a papercraft model.
A couple of corrections. The Z wireframe view does not display an edgeflow. It avoids displaying edges with faces below certaing angles, aka not very sharp edges. If something is very smooth with a lot of faces, for example, it wont draw those edges. You can turn off that feature per object, selecting an object, going to the properties window, clicking the objects panel (the yellow cube), and in the display section, turning on the “Draw all edges” option. That will display a regular wireframe.
Other advice. For mechanical parts that need only one bone per part, I recommend the Bone parenting insteand of the Vertex weight parenting. But I guess vertex weights are needed when exporting to game engines.
Thanks for that correction! good information.
You forgot to add another blender pros. Actually UV editing tools are great in blender than maya. Although not great as max but better than maya.
Yea I really enjoy the UV editing in Blender and I used to hate UVing when I used Maya.
The same road we walked in Blend4Web. Cheers!
Glad to hear it! In fact I am go check out Blend4Web now.
wow I am really impressed that is super cool o.o I’ll show the other guys here Blend4Web